How to sandblast steel: Use compressed air and abrasive media to remove rust, old paint, mill scale, and unwanted materials from the metal surface. The goal is not only to clean surfaces. It is to create the right surface preparation for paint, powder coating, or another protective coating.
This article follows practical abrasive blasting principles used in grit blasting, dry blasting, wet blasting, and coating preparation. It also reflects OSHA and NIOSH safety guidance on silica dust, respiratory protection, and abrasive blasting health risks. Surface preparation standards also explain why steel should be degreased before blasting, since abrasive blasting can spread oil and grease across the surface.
Before You Start, Decide Why You’re Sandblasting the Steel
Before choosing sandblasting equipment, abrasive material, or blasting media, define the goal. Removing light rust, stripping old paint, removing mill scale, and preparing for powder coating all require different levels of force and surface profile.
The finished product should guide the sandblasting process. Media that is too soft may leave rust or coating residue behind, while media that is too aggressive can remove too much material or damage thin steel.
- If you’re removing light rust: Use a controlled approach. Test a small area first, then use enough pressure to clean the steel without cutting too deeply into the metal.
- If you’re removing heavy rust, old paint, or mill scale: Use stronger abrasive blasting media, such as steel grit, steel shot, aluminum oxide, or silicon carbide. Watch for dark, glossy, or uneven patches because they may still hold rust, paint, or mill scale.
- If you’re preparing steel for paint or powder coating: Focus on coating readiness. The surface must be clean, dry, and textured enough for the coating system, so match the media, pressure, and cleaning steps to the required surface profile.
What You Need to Sandblast Steel
A good steel blasting setup needs more than a sand blaster and media. You need steady compressed air, the right abrasive material, safe containment, and proper safety equipment.
Most steel sandblasting applications require:
| Item | Why It Matters |
| Air compressor | Supplies compressed air for blasting |
| Blast pot or blast cabinet | Holds and feeds the abrasive media |
| Blast hose | Moves air and media to the nozzle |
| Nozzle | Controls blast pattern and speed |
| Abrasive media | Removes rust, paint, and contaminants |
| Moisture separator | Helps keep the air supply dry |
| Dust collection | Helps control airborne dust |
| Safety equipment | Helps protect eyes, lungs, skin, and hearing |
Your air compressor, nozzle, and blasting setup must match the job. Weak air supply, worn nozzles, or the wrong equipment can cause uneven cleaning, slow progress, and poor surface preparation. For small parts, use a blast cabinet. For larger steel pieces, a blast pot and controlled work area usually work better.
Choosing the Right Abrasive Material for Steel
The right abrasive material depends on the steel condition and desired surface finish. Some media cut aggressively. Others clean gently. The goal is to remove unwanted materials without damaging the steel.
| Abrasive Media | Best Use | Notes |
| Steel grit | Rust, mill scale, coating prep | Strong choice for hard surface work |
| Steel shot | Peening and cleaning | Creates a different profile than grit |
| Aluminum oxide | Heavy rust and paint removal | Durable and aggressive |
| Silicon carbide | Fast cutting | Very hard and sharp |
| Crushed glass | General paint removal | Often used as a silica-free option |
| Glass beads | Light cleaning and finishing | Creates a smoother finish |
| Plastic beads | Softer paint removal | Useful for delicate parts |
| Baking soda | Gentle cleaning | Also called sodium bicarbonate |
| Walnut shells | Light cleaning | Softer option for delicate surfaces |
| Corn cobs | Light-duty cleaning | Often used where gentle media matters |
| Silica sand | Usually not recommended | Creates a serious silica dust risk |
Silica sand is usually not recommended for abrasive blasting because it can create respirable crystalline silica dust, which OSHA links to serious health risks such as silicosis, lung cancer, COPD, and kidney disease. Safer abrasive options are often preferred, depending on the steel condition, coating requirements, and required surface profile. Softer media like baking soda, plastic beads, walnut shells, and corn cobs can help protect delicate surfaces, but they may not remove heavy rust, mill scale, or tough coatings effectively.
How to Sandblast Steel Step by Step
The sandblasting process works best when you treat it as surface preparation, not a shortcut. Each step affects how well the final paint, powder coating, or protective finish performs.
Step 1: Inspect the Steel
Check the steel for rust, old paint, grease, oil, welds, dents, thin spots, sharp edges, and previous coatings. If the surface has old paint, identify it first because some coatings may contain lead or other hazardous materials.
Also, check the steel thickness. Thin body panels need lighter pressure and gentler media, while heavy plates, brackets, and structural parts can usually handle more aggressive blasting.
Step 2: Clean Oil and Grease First
Remove oil and grease before blasting. Abrasive blasting can smear these contaminants across the metal surface, which may weaken paint or coating adhesion later.
Use the right cleaner, let the steel dry, and clean it again if it still feels slick. A clean surface blasts more evenly and helps the coating form a better bond.
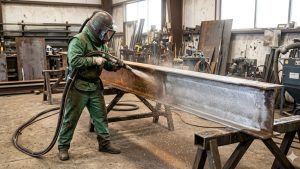
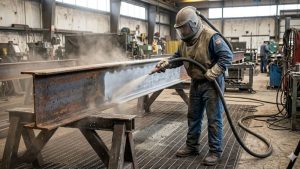
Step 3: Prepare the Work Area
Set up containment before blasting. Abrasive, dust, rust, and paint debris can spread around the area, so keep people, vehicles, finished surfaces, and sensitive equipment away.
If you work indoors, plan for dust collection and air quality control. Place the steel in a stable position so you can blast evenly without awkward angles.
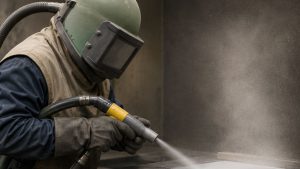
Step 4: Put on Safety Equipment
Wear safety glasses, protective clothing, gloves, hearing protection, and proper respiratory protection. Basic safety glasses or a paper mask are not enough for serious abrasive blasting.
Respiratory risks increase when blasting silica sand, old coatings, or poorly ventilated areas. Use the correct safety equipment for the job.
Step 5: Choose Media, Pressure, and Nozzle Size
Choose sandblasting media based on the surface condition. Stronger media works better for heavy rust, old paint, and mill scale. Softer media works better for delicate parts or light cleaning.
Set pressure based on steel thickness, media type, and desired surface finish. Nozzle size also matters because larger nozzles need more compressed air.
Step 6: Test a Small Area
Test a small area before blasting the full surface. If the abrasive removes rust without gouging the steel, your setup is close.
If the surface gets too rough, lower the pressure or change media. If little changes, check the pressure, nozzle condition, air supply, or blasting material.
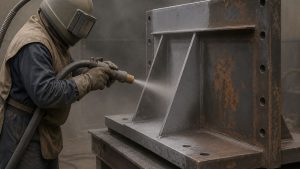
Step 7: Blast in Controlled Passes
Hold the nozzle at a steady distance and move in smooth, overlapping passes. Do not stay in one spot too long.
Too much dwell time can remove too much material or create a rougher surface than needed. A good blast pattern should look even in color and texture.
Step 8: Inspect the Surface
Inspect the steel as you work. Look for remaining rust, old paint, mill scale, glossy areas, or uneven patches.
Use strong lighting to spot missed areas. If the steel needs a specific coating system, check that the surface meets the required cleanliness and profile.
Step 9: Remove Dust and Residue
After blasting, remove dust and loose abrasive with clean, dry air, vacuum equipment, or the coating system’s recommended cleaning method.
Do not paint over dust. It can weaken adhesion and create visible defects. Avoid touching bare blasted steel with bare hands because skin oils can contaminate the surface.
Step 10: Prime or Coat the Steel Quickly
Freshly blasted steel can flash rust when exposed to moisture and air. Humid shops, outdoor areas, and wet blasting increase this risk.
Apply primer, paint, powder coating, or another finish within the coating system’s recommended window. The best workflow is simple: blast, inspect, clean, and coat without delay.
Common Mistakes When Sandblasting Steel
Many sandblasting mistakes happen before the operator starts. Others happen after the steel already looks clean.
- Skipping degreasing: Oil and grease can smear across the surface during blasting and weaken coating adhesion.
- Using the wrong media: Media that is too soft may leave rust, old paint, or mill scale behind. Media that is too aggressive can damage steel.
- Using actual sand without safety controls: Silica sand can create airborne dust that may harm the lungs and cause serious health risks.
- Waiting too long before coating: Bare steel can rust quickly after blasting. If the surface changes before coating, the finish may not last.
What Finish Should Sandblasted Steel Have?
The right finish depends on the next step. Steel that needs primer may need a stronger profile. Steel that needs a smooth, visible coating may need a lighter profile.
In most cases, blasted steel should look even, dry, and free of loose rust. It should not have dust, grease, old paint, or embedded abrasive. The surface should match the coating instructions.
A rough surface is not always better. Too much profile can create coating problems. It can also affect the final appearance. The right surface gives the coating a better bond without damaging the finished product.
When to DIY vs. Hire a Professional
DIY sandblasting may work for small steel parts, brackets, tools, and basic automotive parts. A blast cabinet can help control media, dust, and visibility.
Hire a professional for large steel pieces, heavy-duty applications, unknown coatings, structural steel, or powder coating prep. You should also hire help when the job may involve lead paint, silica exposure, or strict coating standards.
Professional blasting also helps when the finished product must look clean and consistent. This matters for visible metal, commercial signs, and customer-facing steel components.
Conclusion
Learning how to sandblast steel starts with one question: what does the steel need after blasting? Rust removal, paint removal, powder coating prep, and decorative finishing all require different approaches.
Choose the right abrasive material, control your air supply, use proper safety equipment, and inspect the surface often. Then clean the steel and coat it quickly. Good sandblasting creates a clean, even surface that supports a stronger, longer-lasting finish.
If you want consistent results without the trial and error, working with an experienced team like CARV can help ensure the surface is properly prepared for coating from the start.
FAQs
What is the best abrasive media for sandblasting steel?
The best abrasive media depends on the steel and finish goal. Steel grit works well for aggressive surface preparation. Aluminum oxide and silicon carbide cut quickly. Glass beads, plastic beads, baking soda, walnut shells, and corn cobs work better for gentler cleaning.
Can I use regular sand to sandblast steel?
You should avoid regular sand for most blasting work. Silica sand can create respirable silica dust when it breaks apart. OSHA warns that fine silica particles can cause serious lung disease.
Is wet blasting better than dry blasting?
Wet blasting can reduce airborne dust, but it adds moisture to the steel. That can increase flash rust risk. Dry blasting often works better when you need fast coating after surface preparation. The better option depends on dust control, environment, and coating timeline.
What PSI should I use to sandblast steel?
There is no single PSI for every job. Pressure depends on abrasive material, nozzle size, steel thickness, compressor output, and surface condition. Start with a test area. Then adjust based on cleaning speed and surface profile.