Have you ever looked at an old wooden chair or cabinet and wished you could bring back its original shine without spending days sanding by hand? A sandblaster for wood furniture makes that possible. It’s one of the most efficient tools for removing paint, varnish, and years of grime from wood surfaces, saving you hours of hard work. It works by using compressed air and fine abrasive media to gently clean and smooth wooden surfaces. This process reveals the natural grain of the wood that makes your furniture look refreshed and ready for refinishing.
Instead of struggling with sandpaper or harsh chemicals, a sandblaster gives you a smooth, clean surface that’s ready for refinishing. It’s a simple and cost-effective way to restore your furniture’s natural beauty while extending its life. You can adjust the pressure and media type to match the condition of your wood for safer, more precise results. Whether it’s a small DIY project or a full restoration, sandblasting delivers professional-quality finishes with minimal effort.
Why Use a Sandblaster for Wood Furniture
Wood furniture can last for decades, but exposure to moisture, sunlight, and daily wear often causes fading, chipping, or peeling finishes. Traditional sanding takes too long and can damage delicate wood fibers. Sandblasting offers a faster and more even solution.
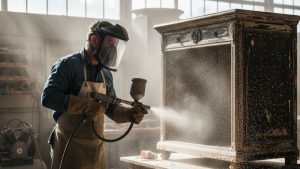
By using compressed air and fine abrasive media such as walnut shells, glass beads, or aluminum oxide, a sandblaster gently strips away old coatings without cutting too deep into the surface. This makes it ideal for both small home projects and professional restorations. If you’re restoring antique furniture or prepping wood for refinishing, a sandblaster can save you money and hours of manual labor.
How Sandblasting Works
A sandblaster uses a compressor, tank, and nozzle to push abrasive media against the surface of the furniture. The air pressure and feed type determine how gentle or powerful the blast will be.
There are three main sandblaster types to choose from:
| Type | Description | Best For |
| Siphon Feed | Uses suction to pull abrasive from a reservoir. Easy to use and affordable. | Small furniture, light paint removal |
| Pressure Feed | Pushes media directly from the tank using compressed air. Strong and fast. | Large projects or heavy coatings |
| Gravity Feed | Uses gravity to drop abrasive into the airflow. Compact and precise. | Detailed woodwork or small touch-ups |
For wood furniture, siphon feed or gravity feed systems are often the best choice. They’re gentle enough for softwood surfaces while still removing paint, varnish, and dirt efficiently.
Choosing the Right Abrasive Media
Not every abrasive is suitable for wood. Using standard sand or overly harsh grit can tear wood fibers and leave deep marks that ruin the surface. Instead, choose softer, eco-friendly options that deliver smooth, controlled results while preserving the natural grain. Selecting the right media ensures efficiency, precision, and safety for every restoration project.
- Walnut Shells: Perfect for removing paint or varnish without harming the surface. Their organic composition makes them gentle on older or softer wood and safe for indoor use.
- Glass Beads: Excellent for fine detailing or creating a smooth, matte finish. They’re ideal for restoring decorative carvings or intricate furniture designs where precision matters.
- Corncob Grit: Great for cleaning and polishing softer wood furniture. This biodegradable option produces minimal dust and leaves a clean, ready-to-finish surface.
- Aluminum Oxide: Best for tougher jobs where deeper coating removal is required. It’s durable and efficient for stripping thick layers of paint or varnish on hardwood pieces.
Each material has its own advantages depending on the project size, wood type, and desired finish. Always test on a small section first to find the ideal balance between cutting strength and surface safety.
Adjusting Air Pressure and Nozzle Size
Air pressure control is essential when working with wood. High pressure can gouge the surface, while low pressure may not remove enough material. The ideal range is 30–50 PSI, which allows smooth removal without damaging the grain. Always test a small section first to ensure the right balance for your project.
Smaller nozzles, typically between 1/8” and 1/4”, provide better control for carvings and corners. Keep the nozzle moving constantly to prevent deep cuts. Always wear gloves, goggles, and a mask for safety, as wood dust and fine media particles can be harmful when inhaled
The Benefits of Sandblasting Wood Furniture
Sandblasting saves time by stripping paint and varnish in minutes instead of hours. It restores detail by revealing fine carvings hidden under old coatings. Moreover, it offers eco-friendly options, since many abrasive media types are reusable and non-toxic. This makes the process safer for both people and the environment.
It’s also cost-effective, reducing the need for harsh chemicals and hours of manual sanding. The results look professional, creating a smooth, clean surface ready for refinishing. If you’re thinking about starting restoration projects, investing in quality sandblasting equipment is a smart decision. It’s a long-term choice that ensures professional results and reliable performance for every refinishing job.
Step-by-Step: Sandblasting Wood Furniture
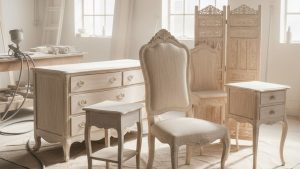
Sandblasting wood furniture is a simple process that delivers professional results when done correctly. By following each step carefully, you can safely remove old coatings and prepare your furniture for a fresh, smooth finish.
- Prepare Your Workspace: Work in a well-ventilated area and cover nearby items to prevent wood dust buildup. Make sure the surface is stable and free of clutter to move the blaster safely.
- Choose the Right Media: Match your abrasive media to your furniture’s surface and coating. Use walnut shells or glass beads for gentle cleaning, and aluminum oxide for tougher paint or varnish removal.
- Set Up the Blaster: Inspect the compressor, hose, and tank connections to ensure everything is secure. Proper setup prevents leaks and ensures consistent air pressure throughout the process.
- Test a Small Area: Before starting, test a hidden section to adjust air pressure, nozzle size, and distance. This helps you find the ideal balance between cleaning power and surface protection.
- Start Blasting: Maintain a consistent distance of 6–10 inches and move the nozzle evenly to avoid uneven cutting. Keep your motions steady to achieve smooth, uniform results.
- Clean the Surface: After blasting, wipe away dust and leftover media using a soft brush or clean cloth. Check for missed spots before applying your finish.
- Finish the Wood: Once the surface is clean and dry, apply a new coat of paint, stain, or varnish. Proper finishing seals the wood, enhances its natural look, and extends its lifespan.
Safety Tips When Sandblasting
Always wear a respirator or dust mask to prevent inhaling wood dust during sandblasting. Use protective gloves and goggles to shield your hands and eyes from flying debris. Avoid blasting in humid conditions, as moisture can cause clumping inside the tank. After every project, clean the blaster, nozzle, and equipment to keep them in good condition and extend their lifespan.
Avoid common mistakes that can affect your results. Using the wrong abrasive, like regular sand or harsh grit, can damage wood surfaces. Applying too much pressure can also cause deep marks; stay below 50 PSI for furniture. Never ignore safety gear, since even small projects produce lingering dust. Lastly, don’t skip surface prep; leftover dust or oil can affect how your finish adheres later.

Other Services Offered by CARV
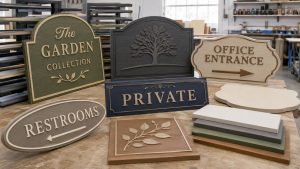
Beyond furniture restoration and sandblasting, CARV specializes in custom fabrication and specialty signage for both residential and commercial clients. One of our most popular services is Channel-Routed Specialty Signs, designed for clients who want a distinctive, professional look that stands out.
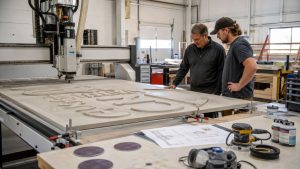
Channel-Routed Specialty Signs are created using precision CNC routing to carve clean, dimensional designs directly into high-quality materials like HDU, wood, or metal. This process allows for deep, detailed engraving that adds texture and depth to any design.
These signs can be customized with:
- Raised or recessed lettering for a premium, 3D appearance
- Painted finishes or metallic inlays for contrast and visual appeal
- Durable coatings that protect against weather and UV exposure
Conclusion
Restoring wood furniture doesn’t have to be difficult or costly. With the right sandblaster for wood furniture, you can safely remove paint, smooth out rough surfaces, and uncover the natural grain hidden beneath old coatings. This method restores fine details and delivers professional results while saving both time and money. It’s an efficient way to bring new life to aged furniture while preserving its character and strength for years to come.
At CARV, we use precision sandblasting equipment specifically designed for wood, metal, and automotive surfaces. Our skilled team handles every project with care, ensuring even blasting, consistent finishes, and durable results that stand the test of time. Whether you’re restoring a single piece or refinishing multiple items, we provide reliable, high-quality service. Contact us today to learn more about our expert restoration and sandblasting services.
FAQs
Can you sandblast wood furniture?
Yes, you can sandblast wood furniture as long as you use the correct abrasive media and air pressure. Sandblasting removes old paint, varnish, and dirt without damaging the wood when done properly. It’s a quick and efficient method for restoring furniture to a clean, smooth surface ready for refinishing.
What media is best for sandblasting wood furniture?
The best media for sandblasting wood furniture includes walnut shells, glass beads, or corncob grit. These materials are gentle yet effective at cleaning wood surfaces without cutting into the fibers. Choosing the right media ensures a smooth finish and preserves the furniture’s natural grain.
What happens when you sandblast wood?
When you sandblast wood, fine abrasive media is propelled onto the surface to strip away coatings and grime. This process reveals the natural texture and restores the wood’s original appearance. If done with proper air pressure control, it cleans the surface without damaging the grain.
What psi to sandblast wood?
The ideal PSI to sandblast wood is between 30–50 PSI. This range provides enough power to remove coatings while protecting delicate surfaces. Always start at the lower end and adjust gradually for best results.